Key Takeaways
- AI content agents often produce low-quality output due to "Instructional Decay." A more reliable architecture uses chained prompts: first generating a structured outline, then writing content for each section.
- The key to a successful content pipeline is keeping a human in the loop. Always publish AI-generated content as a "draft" to a headless CMS for a final quality check before it goes live.
- This tutorial walks you through building an agent that uses OpenAI for generation and publishes structured drafts directly to Wisp's Content API, creating a simple, review-ready pipeline.
You've got a list of blog topics, a working Next.js site, and an OpenAI API key. The idea of an agent that drafts and publishes posts while you sleep sounds great, until you build one and discover "Instructional Decay," where an agent loses focus and prioritizes vibes over the original brief after just a few steps.
The fix isn't a smarter model. It's a better architecture. This tutorial walks you through building an Application Programming Interface (API)-driven content agent that generates structured blog posts with OpenAI and publishes them as drafts to Wisp, a headless Content Management System (CMS) built for Next.js blogs. The human-in-the-loop step is built in by design, so your agent drafts fast without nuking your content quality.
Here's the full pipeline broken down into code you can ship today.
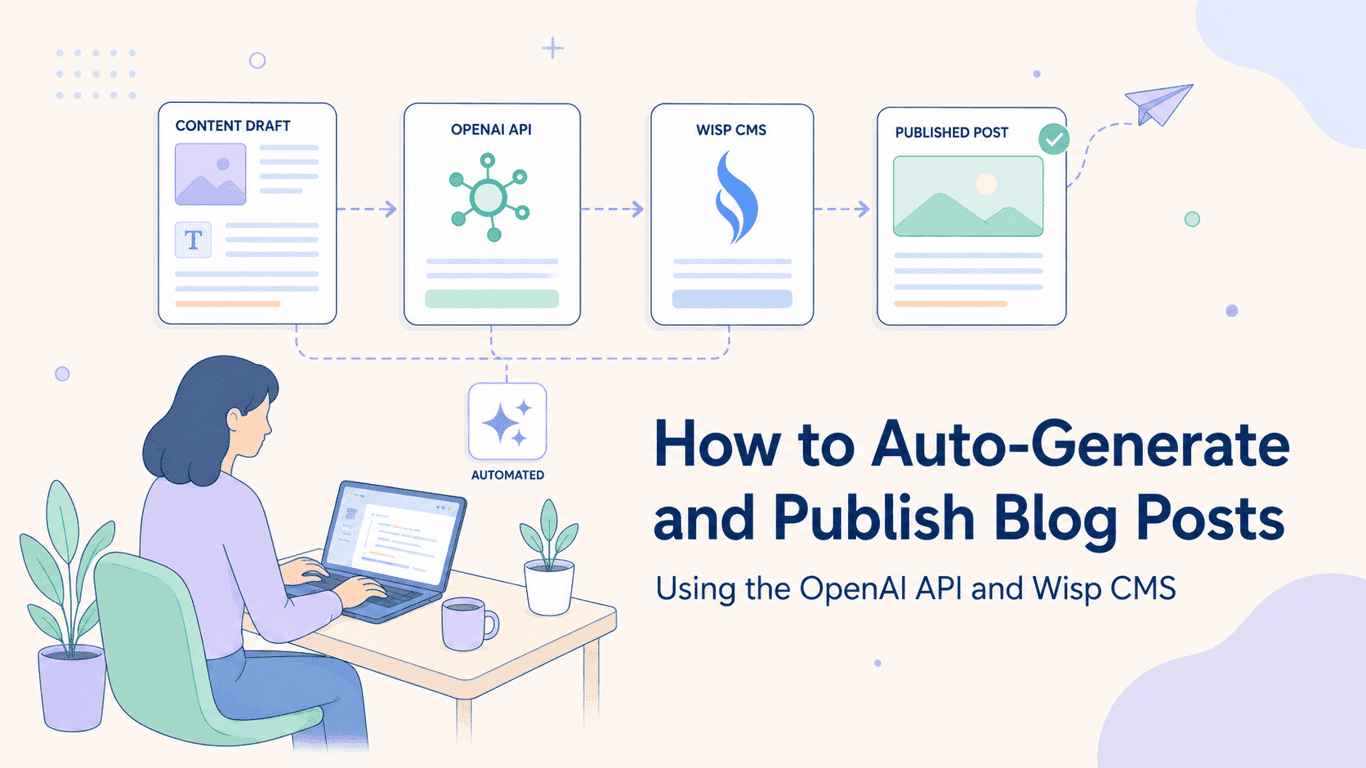
The Architecture: Four Simple Steps
Before writing any code, it helps to have a clear mental model of what the agent actually does.
The flow looks like this:
- Trigger. Something kicks off the agent (a cron job, a webhook, or a manual script run).
- Content generation. An Large Language Model (LLM) receives a topic and returns a structured blog post broken into sections, with metadata.
- Publishing endpoint. The structured content is sent via a POST request to the Wisp Content API, which creates a new draft post.
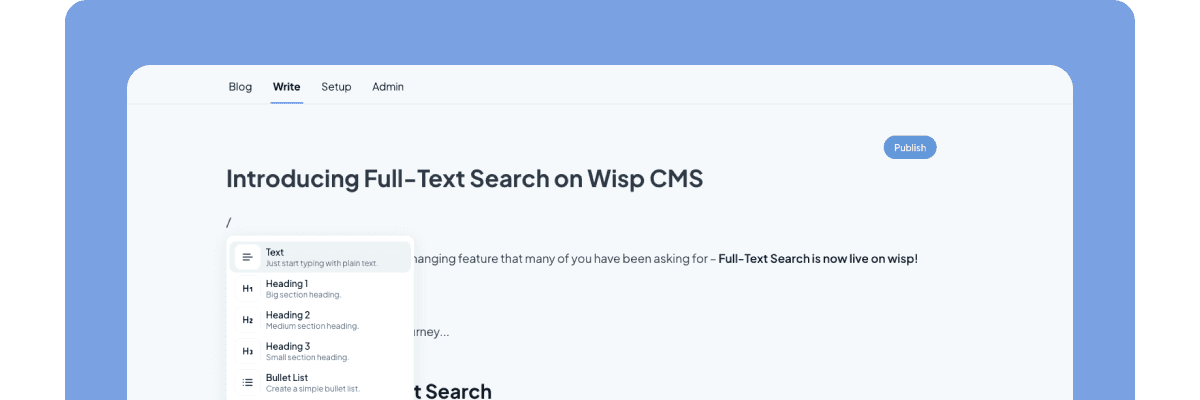
- Review and publish. A human editor opens Wisp's Notion-style editor, reviews the draft, edits if needed, and hits publish.
This is a deterministic pipeline, not a magic box. Your agent does the drafting. You do the judgment call. That's the right division of labor.
Prerequisites and Project Setup
You'll need three things before writing the agent logic.
- A Wisp account and blog ID. Sign up for Wisp. Wisp's free plan includes unlimited blogs and posts. No credit card needed. Once your blog is created, grab your
BLOG_IDfrom the dashboard. You'll also need to generate a REST API key under your blog settings. The REST API docs cover the exact steps. - A Next.js frontend. The fastest path is cloning the official Next.js Starter Kit. Install dependencies with
npm i --legacy-peer-deps, copy.env.exampleto.env, add yourNEXT_PUBLIC_BLOG_ID, and runnpm run dev. Your blog is live locally in minutes. - An OpenAI API key. This tutorial uses the OpenAI API directly, but the pattern is framework-agnostic. You can swap in any LLM provider or use LangChain without changing the structure.
Step 1: Build the Content Generation Logic
The temptation is to write one big prompt: "Write a 1,500-word blog post about X." That's exactly how you get Instructional Decay. Instead of asking for a full article in one go, a better approach is to break the task into smaller steps. As developers experimenting with content agents noted on Reddit, this makes a measurable difference in output quality.
The approach here uses two prompts chained together.
First, generate a structured outline. Then loop through each section heading and generate content independently. This keeps the model focused on one task at a time and dramatically reduces repetition across sections.
import OpenAI from "openai";

const openai = new OpenAI({ apiKey: process.env.OPENAI_API_KEY });

async function callOpenAI(prompt) {
  const response = await openai.chat.completions.create({
    model: "gpt-4o",
    messages: [{ role: "user", content: prompt }],
    temperature: 0.7,
  });
  return response.choices[0].message.content;
}

async function generateBlogPost(topic) {
  // Step 1: Generate a structured outline
  const outlinePrompt = `
    Return a JSON array of 4-6 section titles for a blog post about "${topic}".
    Output only valid JSON. Example: ["Introduction", "Section Two", "Section Three"]
  `;
  const outlineRaw = await callOpenAI(outlinePrompt);
  const outline = JSON.parse(outlineRaw);

  // Step 2: Generate HTML content for each section
  let htmlContent = "";
  for (const sectionTitle of outline) {
    const sectionPrompt = `
      Write a detailed section for the blog post titled "${topic}" under the heading "${sectionTitle}".
      Format the output as valid HTML. Use <p> tags for paragraphs. No fluff, no filler.
      Include concrete examples where relevant.
    `;
    const sectionHtml = await callOpenAI(sectionPrompt);
    htmlContent += `<h2>${sectionTitle}</h2>\n${sectionHtml}\n`;
  }

  // Step 3: Generate SEO metadata
  const metaPrompt = `
    Return a JSON object with three keys: "title" (string), "metaDescription" (string, max 160 chars),
    and "tags" (array of 3-5 strings) for a blog post about "${topic}".
    Output only valid JSON.
  `;
  const metaRaw = await callOpenAI(metaPrompt);
  const metadata = JSON.parse(metaRaw);

  return {
    ...metadata,
    content: htmlContent,
  };
}
A few things worth noting here. The temperature: 0.7 setting balances creativity with coherence. Higher values introduce more randomness, lower values produce more focused (but repetitive) output. The JSON-only instruction in the outline and metadata prompts is a simple Circuit Breaker: if the model returns malformed JSON, JSON.parse throws immediately and you catch it before bad data reaches your CMS.
Step 2: Publish the Draft to Wisp via the Content API
With a structured post object in hand, the next step is sending it to Wisp. The Content API accepts a POST request with your blog content and returns the created post object, including the auto-generated slug.
The most important field in this request is publishStatus. Set it to "draft" every time. This is the human-in-the-loop gate. Your agent creates the content; a human decides when it goes live. As developers building content agents have pointed out, auto-posting without review is the part that actually breaks things in production.
async function publishToWisp(postData) {
  const WISP_BLOG_ID = process.env.WISP_BLOG_ID;
  const WISP_API_KEY = process.env.WISP_API_KEY;

  const response = await fetch(
    `https://www.wisp.blog/api/v1/blogs/${WISP_BLOG_ID}/posts`,
    {
      method: "POST",
      headers: {
        Authorization: `Bearer ${WISP_API_KEY}`,
        "Content-Type": "application/json",
      },
      body: JSON.stringify({
        title: postData.title,
        content: postData.content,
        contentFormat: "html",
        publishStatus: "draft",
        metaDescription: postData.metaDescription,
        tags: postData.tags.join(","),
      }),
    }
  );

  if (!response.ok) {
    const error = await response.json();
    console.error("Wisp API error:", error);
    throw new Error("Failed to publish to Wisp");
  }

  const result = await response.json();
  console.log("Draft created:", result.data.slug);
  return result.data;
}
A few notes on the payload fields:
contentFormat: "html":Tells Wisp to treat the content string as HTML rather than plain text.tags":Passed as a comma-separated string. The tags you generate in the metadata step drop in directly here.slug":Omit it and Wisp auto-generates one from the title. That's usually the easiest path for an automated workflow. This payload maps to Wisp's default post schema, but you can define your own with Custom Content Types.
To wire the two functions together, the main runner is straightforward:
async function runAgent(topic) {
  console.log(`Generating post for topic: "${topic}"`);
  const postData = await generateBlogPost(topic);
  const published = await publishToWisp(postData);
  console.log(`Done. Review your draft at: https://wisp.blog`);
  return published;
}

runAgent("How to use server components in Next.js 15");
Once the script runs, the draft appears in your Wisp dashboard ready for review. The editor feels like a cross between Medium and Notion, so non-technical team members can handle the review step without touching code. That's the point — the agent handles the drafting, the editor handles the judgment.
Step 3: Automate the Agent with a Trigger
Running the script manually is fine for testing. For a real content pipeline, you want the agent to fire on a schedule or in response to an event.
- Option 1: Vercel Cron Jobs. If your Next.js app is deployed on Vercel, you can schedule an API route to run on a cron schedule. Add this to your
vercel.json:
{
  "crons": [
    {
      "path": "/api/run-content-agent",
      "schedule": "0 9 * * 1"
    }
  ]
}
This runs your agent every Monday at 9 AM. The API route at /api/run-content-agent calls runAgent with a topic from your list. Vercel's cron documentation covers the full syntax and timeout limits.
- Option 2: Workflow tools. For event-driven triggers (say, a new row in a topics spreadsheet), tools like n8n or Zapier can hit your agent's API endpoint via webhook. This works well for teams managing a content calendar in Airtable or Notion, where a new approved topic automatically kicks off the drafting process.
There's a lot of hype around complex n8n agent workflows, but the most reliable setups tend to be simple. A cron that fires once a day, generates one draft, and posts it to your CMS for review is genuinely useful. A 12-node workflow that tries to fully automate approvals usually breaks in production.
Handling Quality Control Before the Draft Lands
Even with the human-in-the-loop step in place, it's worth adding a basic Circuit Breaker before calling publishToWisp. This catches obvious failures early and saves the reviewer from having to reject a completely broken draft.
function validatePost(postData) {
  const wordCount = postData.content.split(" ").length;

  if (!postData.title || postData.title.length < 10) {
    throw new Error("Title too short or missing");
  }
  if (wordCount < 300) {
    throw new Error(`Content too short: ${wordCount} words`);
  }
  if (!postData.metaDescription) {
    throw new Error("Missing meta description");
  }

  return true;
}
Add validatePost(postData) between generateBlogPost and publishToWisp in your runner. It won't catch every quality issue, that's what the human reviewer is for, but it will stop genuinely broken outputs from cluttering your drafts queue.
For teams generating high volumes of content, a second LLM call that scores the draft on a simple rubric (relevance, structure, factual density) can act as an automated first-pass filter before human review. Keep that call cheap. A smaller, faster model is fine for scoring. While this agent uses an external LLM, Wisp has built-in features like AI Contextual CTAs and AI Related Posts that use similar technology to enhance content automatically.
Put Your Content Agent to Work, the Right Way
The most reliable AI content agents aren’t magic. They follow a simple, reliable pattern: use chained prompts to generate structured content, and always publish to a CMS as a draft for human review. This human-in-the-loop step is the quality gate that turns a high-speed noise generator into a genuinely useful drafting tool.
Your next step isn’t to build a complex system: it's to test the core logic. Try the two-step prompt from this tutorial on one of your own topics today. When you're ready to connect your agent to a real publishing workflow, Wisp’s free plan includes API access and unlimited posts. Start publishing drafts for free to see how an API-first CMS can simplify your content operations.
FAQs
What is "Instructional Decay" and how does this architecture avoid it?
Instructional Decay is when an AI agent loses track of its original goal over multiple steps. This architecture avoids it by using chained prompts, breaking the task into smaller, focused steps (outline first, then section content) to keep the AI on track.
How does the chained prompt approach improve content quality?
The chained prompt approach improves quality by simplifying the AI's task at each step. Generating an outline first and then writing each section separately prevents repetition and helps the model maintain focus, resulting in more structured and coherent articles.
Why is a human-in-the-loop important for AI content agents?
A human-in-the-loop is important because it acts as a final quality gate. It ensures that only high-quality, fact-checked, and on-brand content goes live, preventing the agent from publishing errors or low-quality drafts directly to your site.
What's the benefit of publishing to a CMS as a draft?
The benefit of publishing as a draft is that it creates a necessary review step. This allows a human editor to catch errors, refine the tone, and make a final judgment call before the content is visible to the public, safeguarding your brand's quality.
Can I use a different LLM instead of OpenAI's GPT-4o?
Yes, you can use a different LLM. The architecture is model-agnostic, so you can swap in any language model provider like Anthropic's Claude or Google's Gemini by updating the API call logic in the generateBlogPost function.
How much does it cost to run an AI content agent like this?
The cost to run this agent depends on your LLM provider's pricing and usage. Wisp's free plan covers the CMS, so your primary expense will be the OpenAI API calls for generating the outline, section content, and metadata for each article.
What happens if the AI generates malformed JSON?
If the AI generates malformed JSON, the script will throw an error when JSON.parse is called. This acts as a circuit breaker, stopping the process before incomplete or broken data is sent to your CMS, ensuring draft quality.